Of the many Ficus trees available to purchase as houseplants, Rubber Plants, also known as Rubber Trees, are certainly one of the most sought-after. Their large leaves are glossy and impressive, often featuring interesting variegation or stunning colors.
In a few easy steps, you could be on your way to propagating your own (or a friend’s) Rubber Plant at no cost. I’ve used my beloved Ficus elastica ‘Ruby’, but the same steps apply to all cultivars.
Prepare The Soil

Rubber plants require a well-draining potting medium to prevent rot while developing roots. The soil should also be light, with large spaces between the particles to deliver oxygen and provide the least resistance to root growth.
A combination of materials to balance drainage and water retention are essential to successful propagation. You can purchase propagating mix online or from a nursery. If you plan to propagate often, you can also make your own mix to create the perfect environment for propagation.
In a bucket, combine equal parts coconut coir or perlite. The coconut coir is light enough to facilitate root growth while retaining enough moisture to keep the cutting in the right conditions for growth. Peat moss performs the same function, but is less sustainable so should only be used if you already have some around.

Perlite – made from expanded volcanic glass – is the small white rocks you may notice in houseplant potting mixes. This material improves drainage by increasing the space between soil particles. It also holds small amounts of moisture, although nowhere near as much as coconut coir.

Mix the soil until evenly distributed. Then, fill a pot with the soil mix and water well. Wait until the excess water has drained from the drainage holes before planting to prevent rotting.
Choose A Branch

With the soil ready, grab your Rubber Plant and take a look at the stems. Identify one with strong leaf growth and no signs of damage or disease. The healthier the stem, the better your chances of successful root growth.
Choose a part of the stem around 10 inches down from the tip with a few sets of leaves. One or two is manageable, but three is preferred. The closer the leaves are together, the better.
Make A Cut

Start by grabbing a sharp pair of secateurs or pruning shears. Sharper cuts heal faster on the parent plant, improving the chances of regrowth. You should also ensure they are 100% clean to avoid spreading disease. Scrub with soap and water before making any cuts.
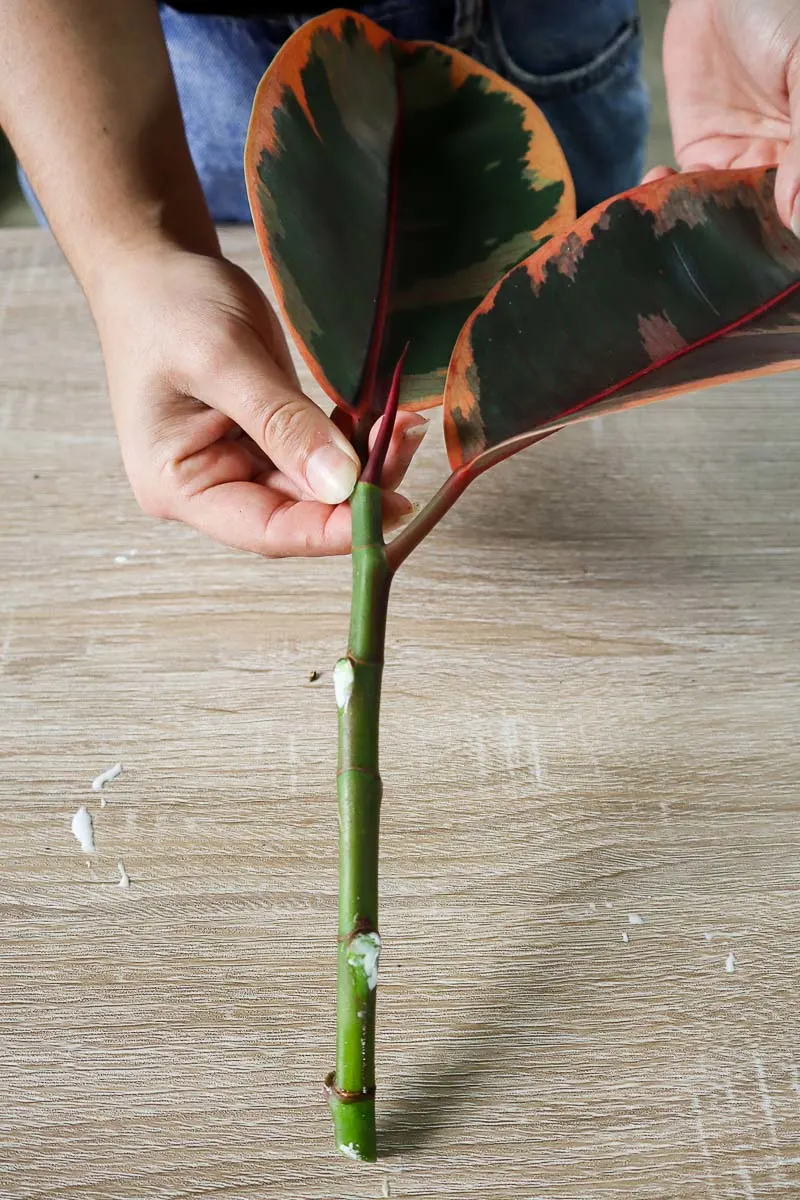
On your chosen branch, count a few nodes down and take a cutting over 10 inches long. Cut just below a leaf node as this is the point where new root growth will start. Alternatively, you can cut on the branch above a node to promote new growth, and simply trim the cutting before planting.

A milky sap will leak from the cutting straight away. This sap can be irritating to the skin, so avoid touching it and wash your hands after propagating to prevent any accidental ingestion.
Remove The Leaves

The bottom half of the cutting will be buried below the soil, so any leaves that may make planting difficult should be removed. This will also promote root growth in the exposed nodes.
Simply pull off the leaves from the bottom half of the cutting, leaving one or two leaves at the top for energy absorption. You can also trim them off with your secateurs to limit any potential damage to the stem.

Dip In Rooting Hormone

Rooting hormone – generally available in powder form – is designed to stimulate root growth in new cuttings. It also protects the vulnerable new growth from disease, improving your chances of success overall.
Remove a small amount of powder and place it in a separate container. You should avoid dipping a cutting directly into the main container to avoid contamination. Don’t remove too much at one time as the remainder will have to be discarded for the same reason.
Dip the end of the cutting into water and then in the rooting hormone, covering the end evenly. Tap off the excess and prepare for planting.
Plant The Cutting

Grab the filled pot prepared earlier and make a large hole in the center with your finger or a pencil about halfway down. Plant the cutting in the hole, avoiding touching the sides as much as possible to keep the powder on the end of the cutting.
Press down around the cutting to secure it in place. If the soil is sufficiently moist and the cutting is buried deep enough, it should remain strongly in place to resist any adjustments from wind or watering.

Place the pot in a warm spot away from direct sunlight to prevent scorching. Keep humidity high in the area with a humidifier or place a clear plastic over the pot to keep moisture in.
Transplanting

If your propagation efforts are successful, there should be root growth after a few weeks. Although you can’t see the roots, you can gently pull on the cutting – resistance indicates root growth. Any new leaf growth on the cutting is also a positive sign.
You can leave the plant in the same pot for a few more weeks until the growth is strong. Then, transplant into a larger pot filled with an airy houseplant soil mix. Keep conditions the same to limit transplant shock and continue to water well.
Once well established, you can move the plant to its permanent home amongst its original family members.

