The Anthurium genus is home to many species of colorful tropical plants in the arum family (Araceae). In fact, it is the largest genus within this family, with around 1 000 interesting species to choose from.
These popular plants have been houseplant staples for decades. While their large heart-shaped leaves are sought after, they are most appreciated for their spadix flowers surrounded by bright and captivating modified leaves in a wide range of colors.
You may also see them called flamingo flower or laceleaf after these interesting blooms.

If you want to produce more of your favorite Anthurium varieties without having to spend the money, these plants are also easy to propagate. They can be propagated by stem cuttings or division, each with its own benefits.
Division is the simplest and quickest method of propagating, yielding two (or more) plants instantly. However, the Anthurium you start with does need to be big enough to separate in order for this to work.
If you have a smaller plant, or one that you don’t want to divide, you can also propagate by stem cuttings. The cuttings will take a while to develop into full plants, but you can produce many more over time rather than waiting for your plant to grow big enough to divide.
Both methods have their benefits. Which you choose will depend on the Anthurium you have and how quick you’d like the process to be.
How To Propagate From Stem Cuttings
Clean Your Tools

Before you begin propagating any plant, including Anthuriums, it’s important to start by gathering and preparing everything you’ll need. You don’t want to get halfway through the process, only to find you’re missing something important.
Luckily, you don’t need much to propagate from stem cuttings. A sharp pair of shears or scissors, a pot and some soil mix or a glass filled with water are enough to get started.
Make sure you clean any tools and containers you plan to use thoroughly before you start. If there are any leftover bacteria from recent pruning or previous soil, these problems will transfer to your new cuttings, limiting growth and doubling your disease problems.
Rinse everything you plan to use with soap and water and disinfect with a 5% bleach solution if needed.
Identify The Right Stem

Once you’re prepared, you can bring in the star of the show – your Anthurium.
To propagate from stem cuttings, you need a suitable stem with high chances of rooting. Identify sections with a couple of leaves (at least two) that are not damaged or yellowing. Avoid young leaves that have just emerged as these will still grow when planted, drawing energy away from root production.
Any stems with aerial roots are ideal. This will give you a higher chance of success when propagating.
Make A Cut

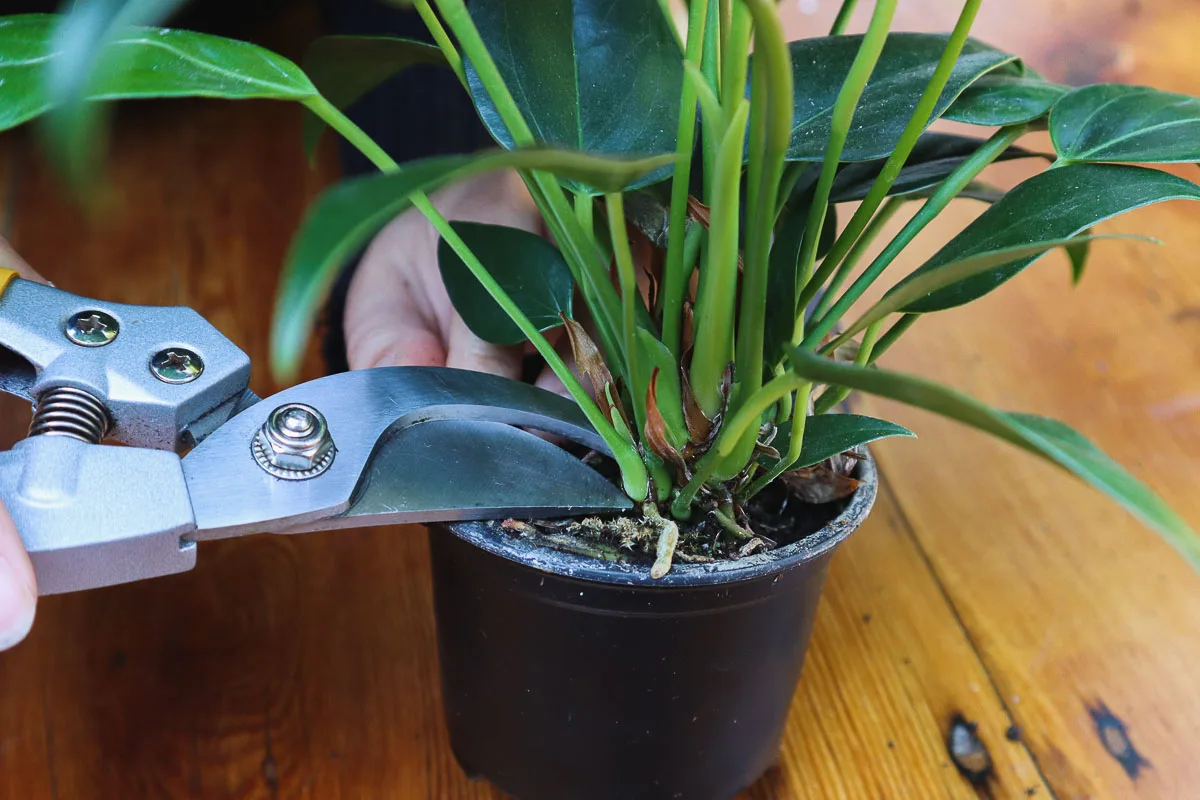
Next, grab your shears or scissors and get ready to trim the cutting. Remove the stem right below the point where the leaves emerge. If it’s difficult to separate your chosen stem, it may be easier to use a sharp knife to make as clean a cut as possible.

Make sure you don’t damage any of the aerial roots in the process of cutting. Also avoid damaging nearby stems to keep the parent plant healthy and problem-free.
Rooting

Anthurium cuttings can be rooted in both water and soil, each with its own benefits. To keep an eye on root growth, it’s recommended to root in water first, later transplanting into soil when the roots are an inch or two long.
Rooting in water is easiest when using a glass propagating station. This keeps the leaves out of the water and holds them upright. But, if you don’t have a propagating station, you can also use a regular glass covered with plastic wrap to keep the cuttings in place, or use a narrow glass to hold the leaves upright.
It’s best to use filtered water or rainwater as the chemicals in tap water can impact root growth. But if you don’t have any around, simply leave the water out for a day or two before use to allow the chlorine to dissipate.
Simply fill your glass with water and pop the cuttings in, moving them to a bright spot away from direct sunlight. Warm and humid areas will provide the best environment for root growth.
Care

Oxygen in the water will slowly deplete over time, requiring continual top-ups to encourage root growth. Make sure the water line always remains above the roots and change the water completely around once a week to prevent bacterial buildup.
Cuttings should take a couple of weeks to begin developing roots. Once they have grown around 2 inches long, transplant the cutting into a pot filled with a well-draining houseplant potting mix. You can purchase these online or mix your own by adding one part perlite and one part coconut coir to two parts high-quality potting soil.
Once you’ve transplanted, keep your Anthurium well-watered for a few weeks to allow the new roots to adjust to soil conditions. After that, you can treat your cutting as you would all the other Anthuriums in your collection.
How To Propagate By Division
For impatient gardeners, propagating by division is the best option. You will get two mature plants or more out of one basically instantly, doubling your stock in a matter of minutes.
Remove The Plant & Inspect The Roots

Dividing starts with removing the plant from its existing pot. If the roots are overgrown, you may need to squeeze the sides or use a knife to free them before removal. If you can wait to divide until your plant needs repotting, you can complete two tasks in one and limit your chances of shock.

When the plant is free, remove some of the soil around the roots and inspect them. Look for any signs of damaged or mushy growth that should be trimmed before replanting. Tease the roots gently to release them, making them far easier to handle.
Identify Divisions

Next, look at the base of the plant for areas where you can naturally split the stems. Splitting them in half down the middle is easiest, but for larger plants, you should be able to identify multiple offshoots. Each section should have a couple of leaves and enough roots to grow successfully on its own.
Split

This next step is not only the easiest, but also the most fun. Grab your divisions and simply pull them apart, shaking the roots apart as you pull to avoid snapping them. If the roots are long, you can trim them slightly to make the splitting process easier.

Prepare Your Soil Mix

Now that you know how many Anthuriums you’ll be potting up, prepare the right number of pots. First, get the right soil mix ready. It needs to be well-draining to avoid root rot in these sensitive plants. Look for a houseplant-specific soil mix at your local nursery or make your own by combining two parts potting soil with one part perlite and one part coconut coir or peat moss.
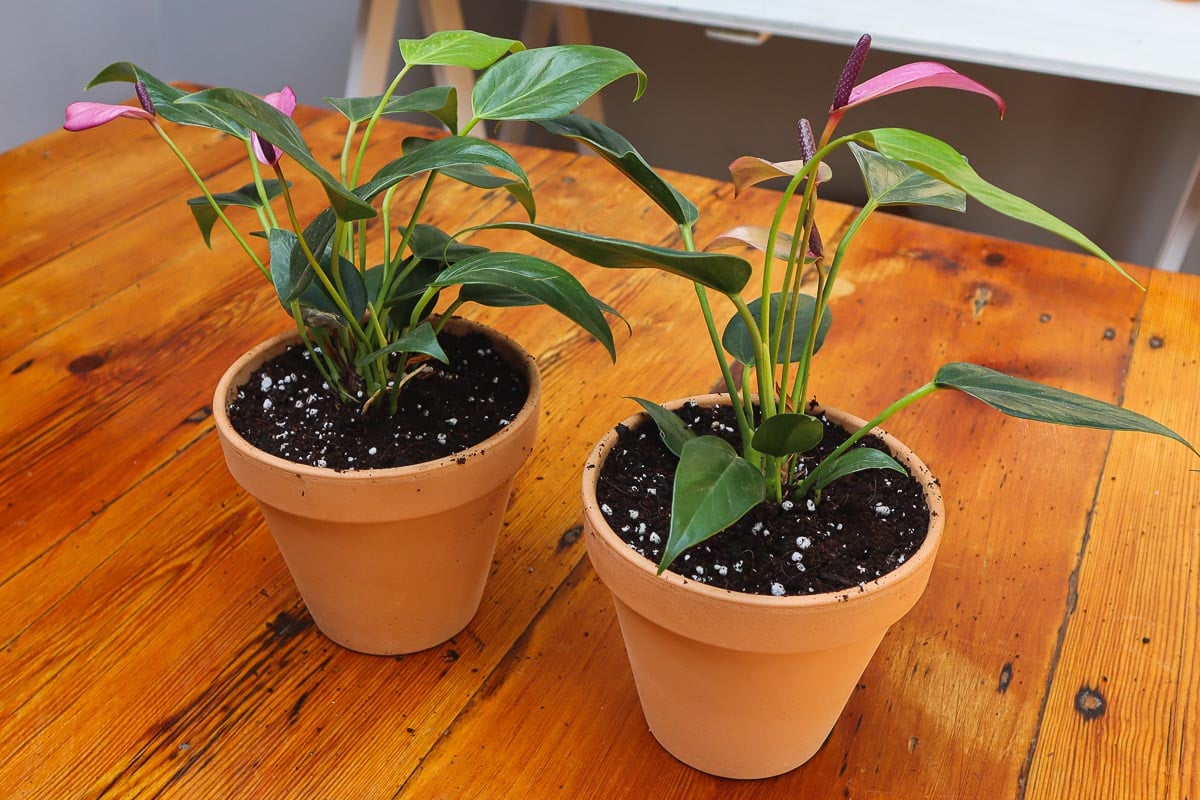
Fill containers with this soil mix to just below the rim. Terra cotta pots are recommended for Anthuriums as they draw excess moisture away from the soil, but ceramic or recycled plastic pots are also great options.
Repot

Matching your divisions to their pots, the only thing left to do is plant. Make a hole in the center of the pot with your finger or move the soil to the side with your hand, depending on the size of the division.

Plant the Anthuriums, filling in with extra soil where needed and pressing around the base gently to anchor the plant in place. Water immediately after planting to allow the roots to settle into their new homes.

Care

Once you’ve replanted, you’ll need to keep an eye on your divisions for a few weeks. They may wilt slightly or yellow in response to the shock of dividing and repotting, but with the right care, they should recover quickly.
After the initial adjustment period, you can treat your divisions as you did the parent plant, watching them grow into full and flowering plants.

